Summary: How to winterize your commercial pool: Follow 8 key steps to protect water quality, prevent damage, and ensure a smooth reopening for commercial and public pools.

As summer pool season winds down, it may be tempting after a busy season to speed through the seasonal closing process. But winterizing your public or commercial pool is one of the most important maintenance tasks of the year.
It’s easy to assume that only pools in colder regions need to be winterized, but even in milder or warm climates, closing your pool properly can prevent algae growth, equipment corrosion, and expensive repairs. Whether you operate a hotel pool in Florida or a recreation center in Massachusetts, winterizing helps preserve water quality, extend the life of pools and pool systems, and ensure a smooth reopening next season.
Here’s a comprehensive checklist so you’re prepared and know how to winterize your pool the right way: protecting equipment, maintaining water quality, and meeting local compliance requirements.
Step 1: Balance Water Chemistry
Balancing your pool’s water chemistry before closing down for the winter is one of the most important–and most overlooked–steps. It may seem like an unnecessary task, given that nobody will be swimming in the pool water over winter. But even though your pool won’t be actively used during the off-season, the water is still capable of causing significant damage if it's chemically unbalanced. Skipping this step can significantly cost you in repairs, cleanup, and chemical treatments when you reopen.
Think of it as insurance for your pool’s structure, equipment, and water quality throughout the winter. Leaving water properly balanced before closing helps prevent surface damage from corrosion, mineral deposits, and scale, protects metal equipment from water corrosion, minimizes the growth of algae and bacteria over winter, and helps prep your water so that it’s cleaner and more manageable with a reduced chemical demand come spring.
A couple of tips: avoid using floating chlorine dispensers in vinyl-lined pools, as they can bleach and damage liners and do not over-chlorinate. While it may seem like a good idea, excess chlorine can degrade covers and pool surfaces over the winter.
- Adjust pH to 7.4–7.6. Leaving the pH at this level keeps water comfortable and helps chlorine work efficiently.
- Bring Total Alkalinity to 80–120 ppm. This stabilizes the pH and prevents large swings that can lead to corrosion or scaling.
- Bring Calcium Hardness to 200–400 ppm. This prevents water from leaching calcium from surfaces (including plaster and grout), which causes etching and deterioration.
- Shock the pool: Superchlorinate to eliminate organic contaminants. Check that Free Chlorine levels are at 2-4 ppm before covering, which ensures the water is sanitized.
- Add algaecide: Use a non-foaming, winter-grade algaecide to prevent algae growth.
Lastly, document your final water chemistry readings. This not only gives you a record for Health Department compliance, but in the spring, when it’s time for reopening, it gives you an understanding of what state the water was in before winter.
Step 2: Clean and Vacuum
Because organic matter can create a feeding ground for algae and bacteria, it’s important to leave your pool as spotless as possible to reduce the risk of algae and buildup.
- Skim and vacuum debris from the surface and bottom.
- Brush pool walls and tiles to remove algae spores.
- Clean skimmer baskets, pump baskets, and filters thoroughly.
- Backwash the filter system to ensure clean and dry media.
For cartridge filters, remove and clean or replace as needed.
Step 3: Lower the Water Level
Reducing water helps prevent freezing damage.
- Lower water to 4–6 inches below the skimmer or tile line, depending on your cover type.
- Do not completely drain the pool—this can damage plaster and create pressure issues.
Check manufacturer recommendations for specific drain levels for your pool type.
Step 4: Drain and Blow Out Plumbing Lines
While you don’t want to drain the pool water, you do want to drain your plumbing lines. Frozen water in pipes can cause expensive cracks and leaks.
- Turn off pumps, heaters, and chemical feeders.
- Drain all equipment including filters, heaters, pumps, chlorinators, and chemical lines.
- Blow out lines with an air compressor or professional blower. Start with the return lines, then skimmers, and finally the main drain.
- Add pool-grade antifreeze to any lines that can’t be fully drained. Use antifreeze specifically designed for pools—never use automotive antifreeze.
Step 5: Protect Pool Equipment
Once drained, your equipment still needs protection from the elements.
- Remove and store plugs, baskets, and drain caps in a labeled container.
- Disconnect and store pool vacuums, skimmers, and accessories indoors.
- Cover equipment (such as heaters and pumps) with waterproof, breathable covers if left outside.
- Remove and store ladders, diving boards, and handrails if applicable.
Step 6: Cover the Pool
A secure, well-fitted pool cover protects the water and prevents debris accumulation. Safety covers are also recommended for public pools to prevent unauthorized access and meet liability requirements; using a cover helps keep people safe.
- Use a commercial-grade safety cover or solid winter cover.
- Secure the cover tightly with anchors or water bags to prevent wind damage.
- Remove standing water and debris from the cover regularly throughout winter.
Step 7: Document Everything
Recordkeeping is both a good practice that informs pool owners with essential information, and a requirement for commercial facilities.
- Document chemical levels, maintenance tasks, and dates for health department inspections.
- Log equipment storage and servicing to track warranties and usage.
- Photograph the closed pool for insurance purposes.
Step 8: Maintain Off-Season Checks
Your job doesn’t end once the cover is on.
- Inspect the cover monthly for tears, sagging, or debris.
- Test water chemistry every 4–6 weeks if possible to monitor pH and chlorine levels. While your pool is seeing fewer swimmers (with less contaminants), and chlorine dissipates more slowly in colder temperatures, it’s also less effective. Testing regularly will help you keep levels where they need to be to keep the water clean.
- Check equipment sheds for signs of moisture, pest activity, or leaks.
- Ensure signage remains clear for closed facilities to avoid liability risks.
Final Thoughts on Commercial Pool Winterization
Winterizing your public or commercial pool may feel like a daunting task, but with a structured approach and checklist in hand, you can protect your facility from costly winter damage and ensure a smooth reopening come spring.
If you’re unsure about any step—especially blowing out lines or winterizing complex systems—consider hiring a pool company with certified pool operators. The upfront investment often pays for itself by preventing expensive repairs and downtime.
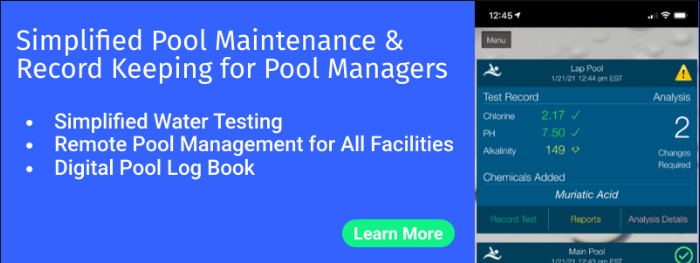
Using a pool chemical calculator and logbook like Pool Shark H20 will also greatly simplify the process. Pool Shark H20 will perform the complex chemistry math equations for you, automatically calculating needed adjustments. It then locks, saves, and archives records, keeping them digitally accessible for whenever you need them, from whenever–saving you valuable time over the winter (as well as during the summer) each time you need to test water chemistry again. Instead of digging through files or trying to remember where the paper logbook is, your latest records are right there in your phone.
Pool Shark H20 makes it easy to stay proactive and protected so your pool will be clean, safe, and fully ready to welcome guests again come spring.